Centerpieces are a great opportunity to transform your space and to communicate your party theme/interest/mission.
Below are a couple of demos to help you out. Use these demos precisely or use them as inspiration. Even if these don't match your exact theme/interest/mission, you'll be able to glean ideas on how to think broadly so that your closet ends up on your party table. These demos don't require you to spend money or to purchase throwaway party store items. Instead, they ask you to draw on household materials you already own. Break into your closet, kitchen, book shelves and you'll be amazed by centerpiece function these goods can have.

- This first display may be appropriate for a Birthday Party, Bat Mitzvah, Sweet 16, or Bridal Shower. All you needs are colorful, spunky shoes and a hat box. If you want to spice this up a bit more, stuff the shoes with flowers.
- This next suggestion also involves digging in your closet and may be used at the aforementioned events and also at a going away party. Just stuff a cute purse with some flowers. You can place flowers in both sides of the bag or you can do what I did and go for a more asymmetric look. You can bring those heels back in if you want to add a bit more. (For a friend leaving for a semester abroad or moving to a new city, replace the cutsie handbag with a backpack).
- This next idea can apply to all of the aforementioned ideas and may be especially useful for a party for the younger set. If you're making a party for an aspiring ballerina, this is a great way to put that hobby on the table and make it part of your event.
Let's deconstruct this a bit so that you know how to DIY.
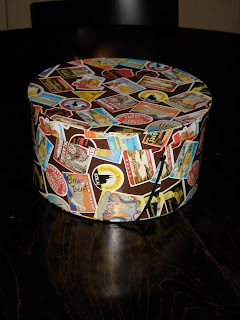 |
| Step #1: Place hat box in the center of table |
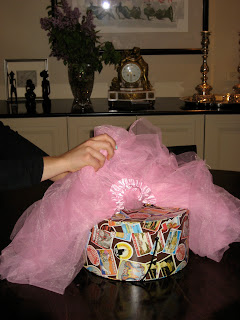 |
| Step #2: Place ballerina tutu around/over the box |
 |
| Step #3: Place vase and flowers on top and in the center of the box. |
 |
Step #4: Place crown or other accessory (ribbon, belt, sash all work too) around the vase.
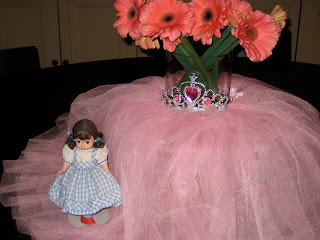
Step #5: If you want to add some more, I'd recommend that you accessorize at the base by placing a doll, ballet slipper, or perfume bottle there. |
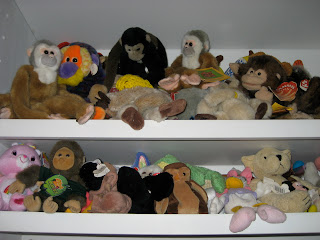
- Next up, breaking out the animals (stuffed animals that is). This is great for baby showers and birthday parties. This gives you an opportunity to incorporate a child's favorite fuzzy friends into their celebration.
 |
| Out of the box! |
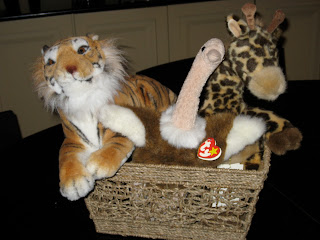 |
| Jungle creatures in a wicker basket. This is great for a jungle or safari themed party. If you don't have a basket like this, you can use a shoe box, cover it with a neutral toned scarf, and put the animals in there. |
- Now for a different look... let's take a look at how you can use fresh flowers and fruit in your centerpieces. Recycle the lemons that flavored your water for this arrangement and make sure to compost them afterwards. This is great for pretty much any kind of spring/summer event. First I'll give you a glimpse of the final product and then we'll do the step-by-step.
Now for the steps:
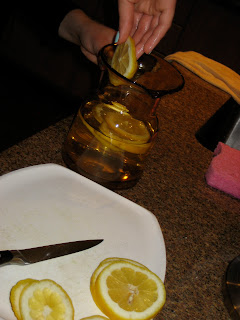 |
| Step#1: Chop locally grown lemons and place them in water inside of a small pitcher. |
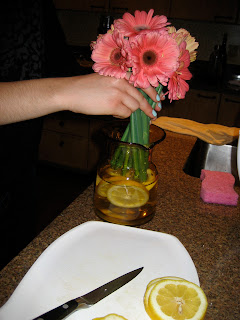 |
| Step #2: Press the lemons against the pitcher's walls and place the flowers in the center. Various color schemes are great for this. For this demo we went with bright pink flowers to contrast the yellow lemons. Purple, blue, green, orange all also work great. |
- Continuing with the warm weather feel of the last demo, now I'll show you one for a beach themed or BBQ party. Use your beach/pool side accessories (towel, sunglasses, beach read, and sunhat) to create a display. As usual, prep time is just a few minutes and the impact is great.
- This is another floral springy arrangement for a wide variety of events. Let's start with your materials:
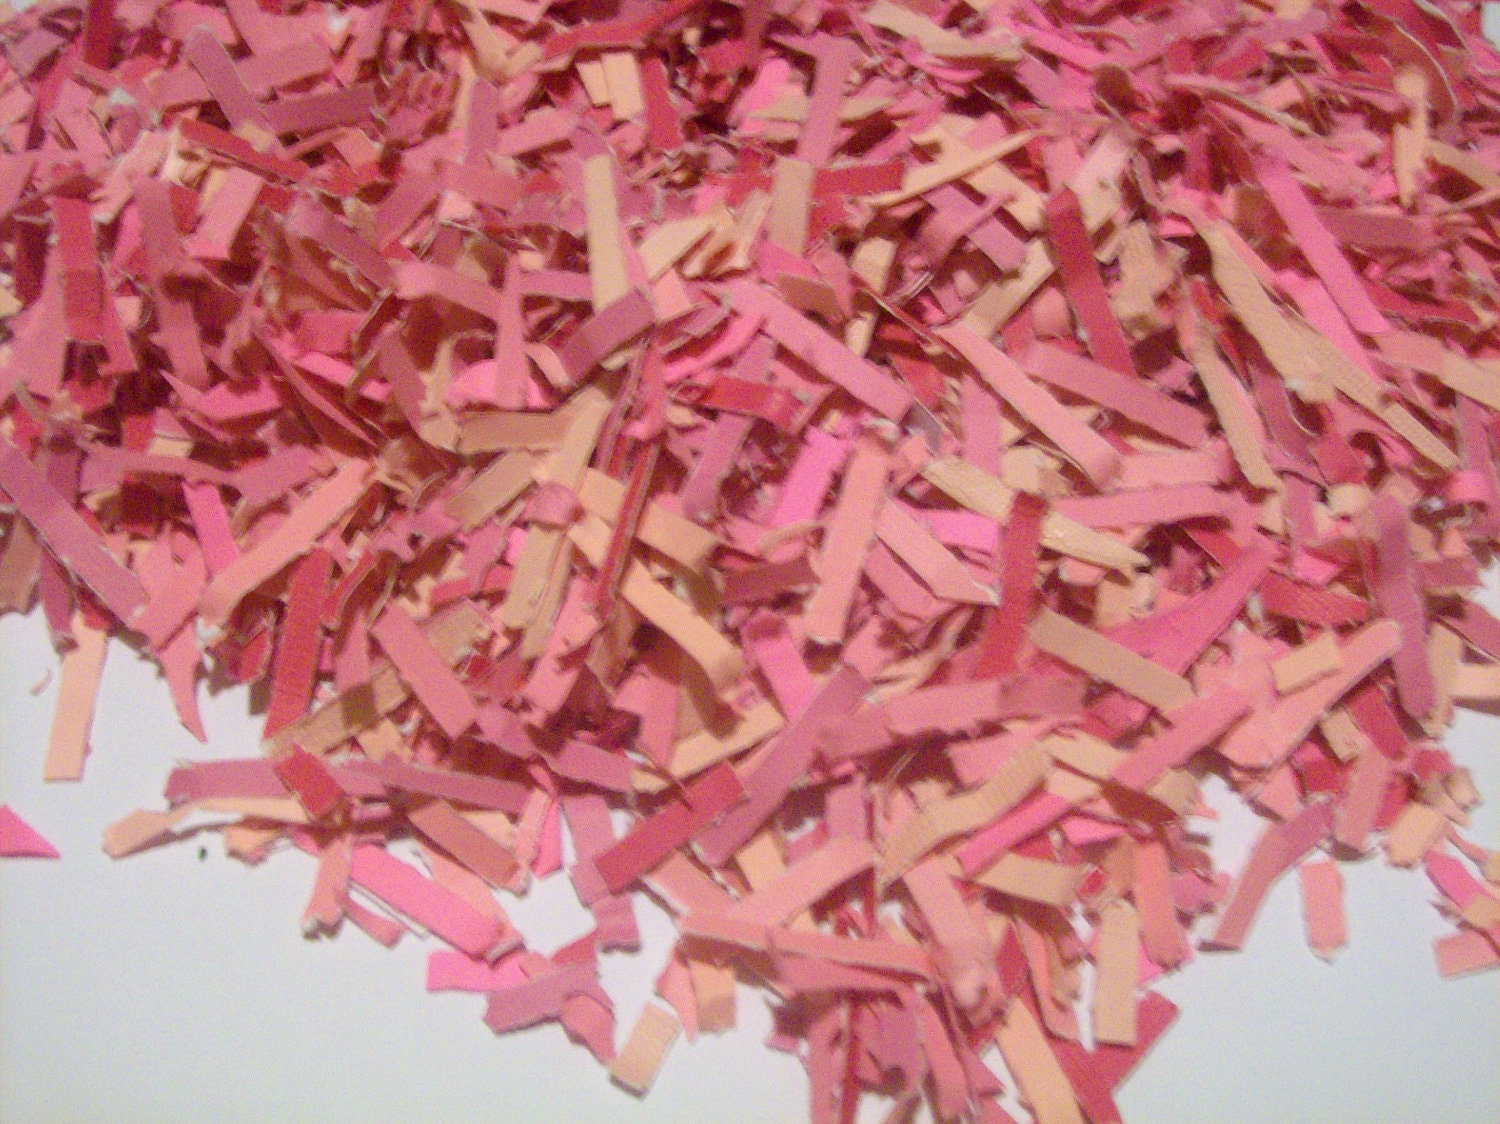
- Confetti! If you have a paper shredder or hole puncher, you can take your old paper and turn it into a splash of color. This can stand on its own or go around another centerpiece. You definitely don't want to waste paper by shredding it for this purpose. But if you have old magazines, birthday cards, or construction paper that you're going to dispose of anyways, this is a good intermediate step before it hits the trash. The more colorful the paper, the better. When the event is over, make sure to place this confetti in a recycling bin. (So that you're able to do so, place the confetti in spots where it wont get splattered by the food on the table.)
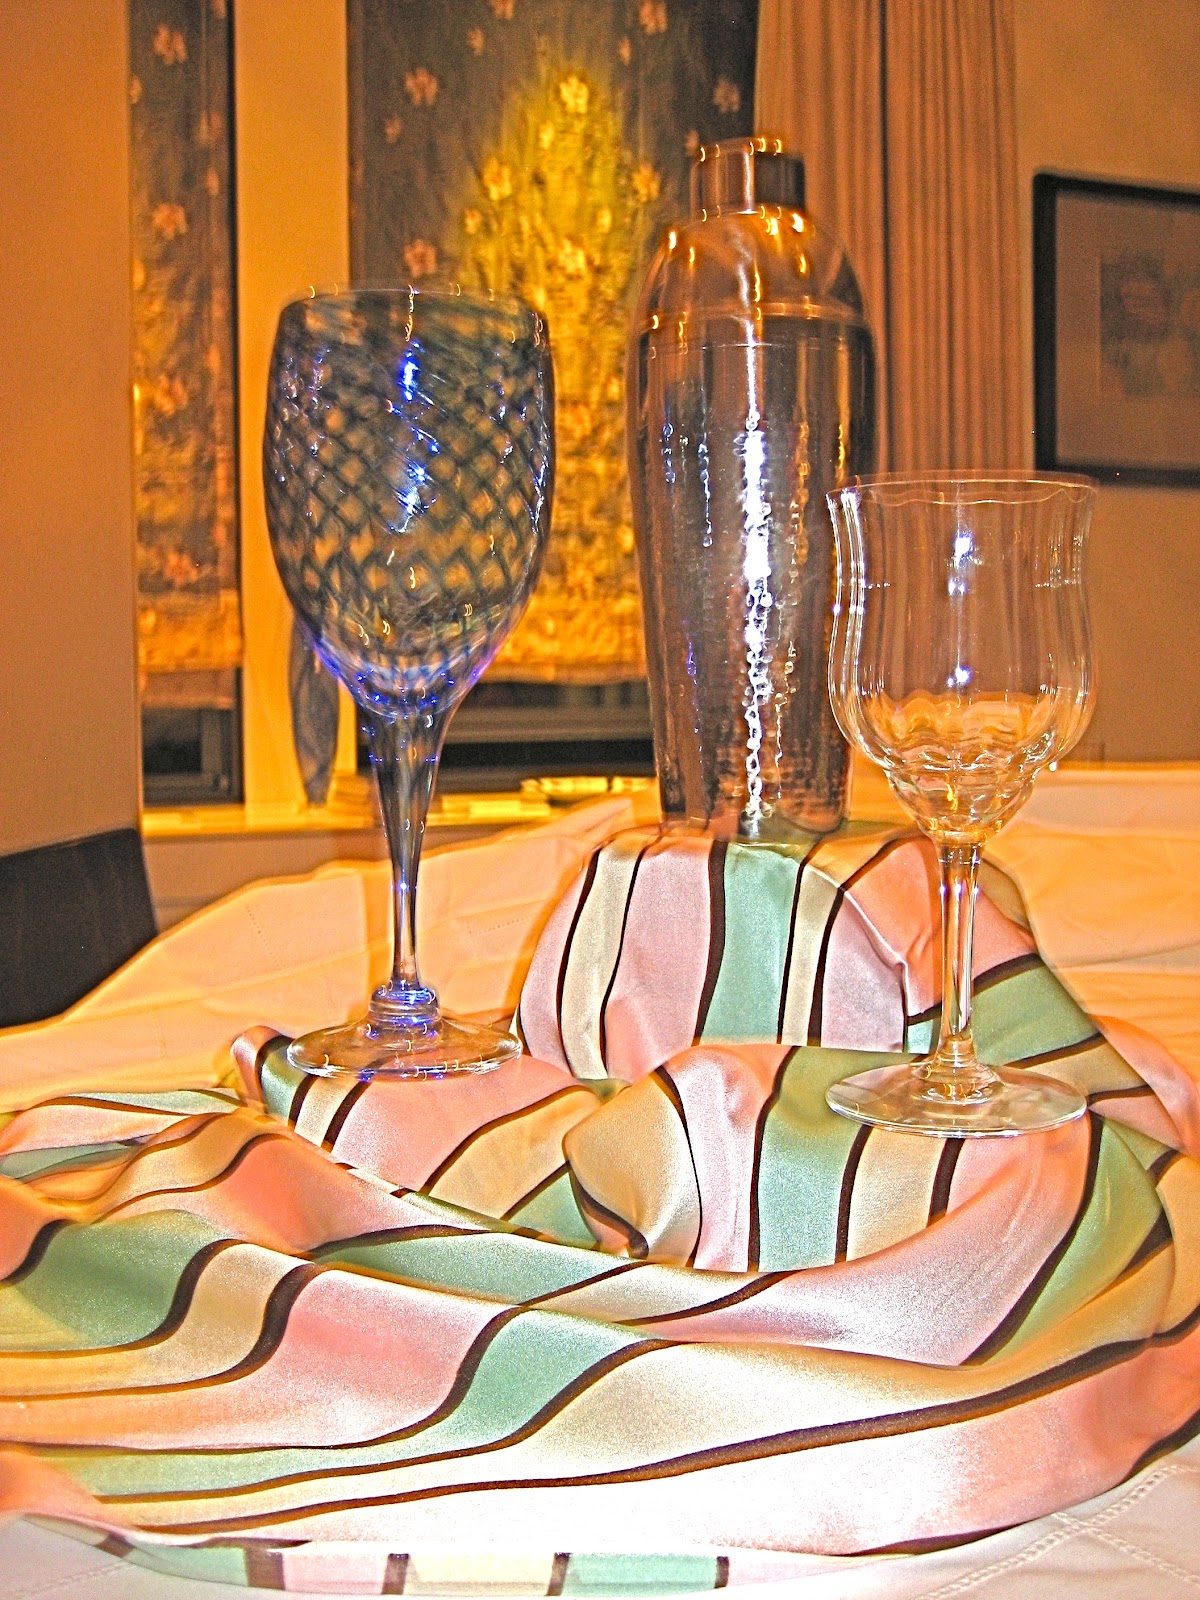
- Last but not least is a sophisticated display for a cocktail party. This may be used for a 21st birthday party, rehearsal dinner, holiday party, dinner party, and more.
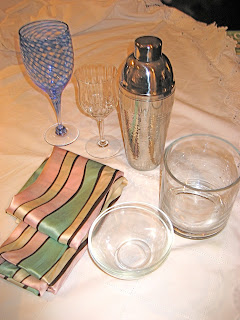 |
| Your materials: one scarf, 1 vase, 1 drink mixer, 2 drinking glasses (preferably different ones), 2 small bowls. |
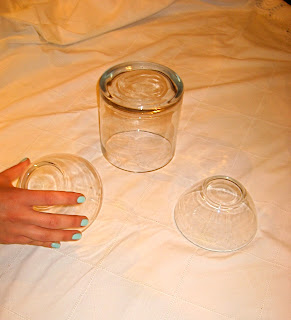 |
| Step #1: Turn the vase and the 2 bowls upside down as shown above. |
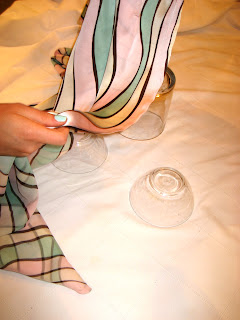 |
Step #2: Drape the scarf over the glassware.
|
 |
Step #3: Cover the glass completely and then leave the leftover scarf as you see fit.
If there's a lot leftover, you may want to fold it under. |
 |
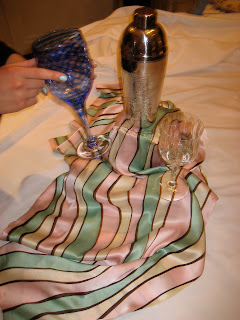
| Step #4: Place the shaker on top of the vase (since the vase is the tallest of your glass items). |
 |
Step #5: Place the glasses on top of each bowl.
|
 |
| Step #6: Make sure that your glasses are securely in place. If you're scared the table will shake and the glasses will fall, then tape the bottoms of the glasses to the scarf (making sure not to damage the scarf). If you think any of the materials are too fragile for taping, then make this a welcome display. In other words, don't leave it where your guests will be moving around and getting their food. Instead place it on its own table just for guests to see on their way in. |
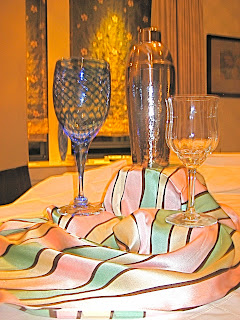 |
| Step#7: TADA! This is it! |
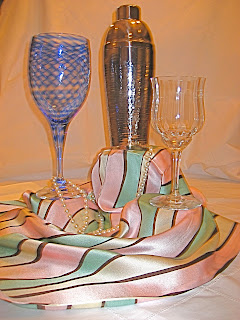 |
Step #8: As a final touch, you can add a string of pearls. This makes the display more feminine and bridges the cocktails with a more fashion oriented vibe (great for bachelorette parties).
|
The bottom line is - before you head to Party City, brainstorm based on what you've got at home. You can use your household items to create a sophisticated, simple, easy-to-build centerpiece. If your party's honoree plays the violin or loves to paint, then use the props relevant to those hobbies (violin, violin box, sheet music, CDs, paintbrushes, paint cans, mixing jars, easels, etc.) If you want more suggestions for a particular event, please feel free to comment with or email in the event description.
Happy centerpiece creating!


No comments:
Post a Comment